Skeletons, Fire, and Webs, Oh my

Fred.

Well, exactly what I thought would happen with the panty hose, did. It stains darker than I wanted. BUT…I’ve been outvoted as Jen, Kyle, and one of our babysitters like it as is.

And, Alec has been on this Skeleton OBSESSION since I hung Fred. Wearing his skeleton shirts, playing with his lego skeletons, asking to BE a skeleton, telling us we have skeletons inside us, asking about the kitten’s skeleton, TALKING TO FRED, asking if he can give Fred a lightsaber to fight, asking why Fred cannot move…

Well, suddenly, Alec most decidedly DOES NOT like Fred anymore. Poor kid asked me where Fred was. I show him to the sliding door, where Fred hangs just beyond. “No, Fred doesn’t have yucky stuff on him”. Well, he does now, son. He does now…

The darkness does give nice contrast.

And for some reason, I really like the foot here.

Still mad the head got a bit messed up when he fell…, but I guess it’s ok.

So, Fred is a success with everyone but me. And I’m picky. I’ll just have to make another one to please only me, right? Maybe next year. Maybe later. We’ll see how it goes.

Now, I gotta figure out how to impale the poor guy. And light him…

The Island King Torch got another little workout for a picture.

Island King on the left, a regular torch on the right.

I’m liking the idea of just acouple of those instead of more of the regular variety.

And, just to show it off a bit, I fired up the web gun last night and re-webbed the chair.

As said before. Even I can make decent looking webs with this thing.

If it looks a bit barren, it’s because I only used one gluestick.
The little balls are from when we cleaned it off after the first time. Would make for some great egg sacks in a dedicated spider area, rolling up small balls and sticking them in the web.

Sure to have fun playing with this stuff…

The Island King.

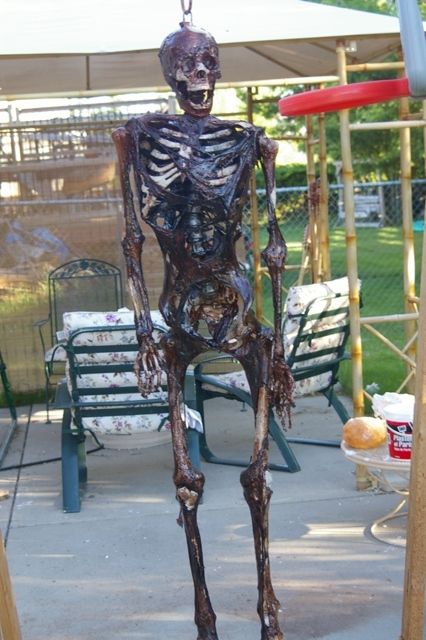
THE ISLAND KING WAS REDESIGNED FOR THE 2009 SEASON, PLEASE SEE HERE FOR NOTES ON IT.

Was in WalMart at lunch yesterday.

See, I need more torches this year, and they have become rather pricey this year as opposed to previous years. SOME WalMart’s have some halfway decent priced ones, some don’t. I’m waiting for the clearance to hit (mid July, typically) and have been scouting out which WalMarts to look at. The one near home has em, one of the 2 near work does not, haven’t checked the other.

But, while checking this one near work at lunch, I ran across “The Island Kind” torch. It was in a box, not sitting out, but boasted a “huge flame” and “no mess refilling”. And the picture indeed had a large flame atop a rather large canister. I could not pass one of these up.

Getting to my car, and opening it up, I was greeted with an impressively sized canister, the top of which formed a funnel to make refilling easy, and to guard the wick that sat a full 1.5″ up from the bottom of the funnel, but Even with the top of it so as to not be seen once set up. Making it look like the bowl itself was on fire.

Filled it up to let the wick soak, and went off to Kyle’s Scout Pinewood Derby deal. Getting back, I assembled the pole.

Rather, I attempted to.

4 sections meant to screw together, along with the top meant to screw onto the pole. Half the sections would not screw properly and did not fit in any order whatsoever. And what should have been a simple job turned into a cursing nightmare, and my solution to most such problems of “get a bigger hammer” finally ended up resolving the situation (though some of those pieces will never come apart again).

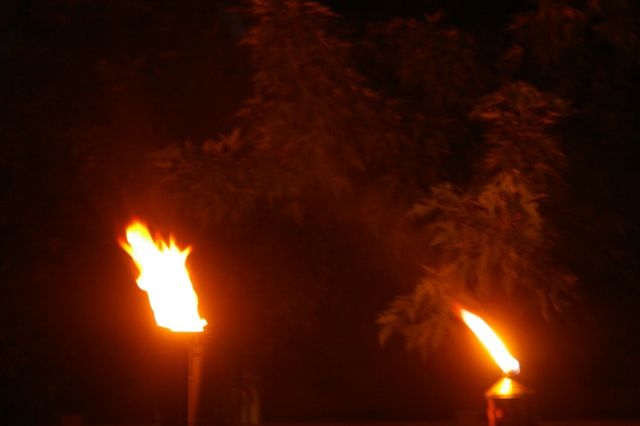
Lighting the thing up next to a regular torch, I was thoroughly unimpressed. The flame was no wider, and only a little taller when measured from the top of the canister up (not counting the 2″ or so the funnel goes down).

So, we snuffed it out. The instructions having failed, time to modify. Breaking out the utility knife, I cut apart the support threads on the wick, and then fanned out the fiberglass strands to give more surface area. A trick I learned from observing my older torches giving off better flame when those support threads inevitably burn off before the fiberglass.

This yielded a much more impressive flame that nearly covered the entire bowl and reached well into the night air above. And yet, still, it could use some improvement, and will likely improve as the wick wears. I think it could use a LONGER wick as well, which would allow better coverage once fanned out and likely fill the entire bowl. I’ld say cotton wick would bear some thought, but would be worried about it burning up.

So, the Island King as packaged will produce a rather uninspired flame until either the wick wears and fans naturally, or you help it along. Then it’s a thing of beauty, but still could be improved upon. The pole it’s on sucks. Period. Plain and simple. And the burn time is a questionable 4 hours “for full flame effect” or 8 hours total (and sure to be chewing up your wick towards the end).

For our purposes, 4 hours is plenty of time for Halloween night, and the larger flame will help further distinguish the front from the back with 2 styles. Fewer sources of light also help the plans for the back yard, so fewer of these larger torches is becoming the plan here. I can fix the poles, reinforce with rebar, or replace if needed.

For nearly any other use, I’ld say you’ld be better off buying more smaller ones for the same price.

Pictures will be forthcoming as soon as possible.

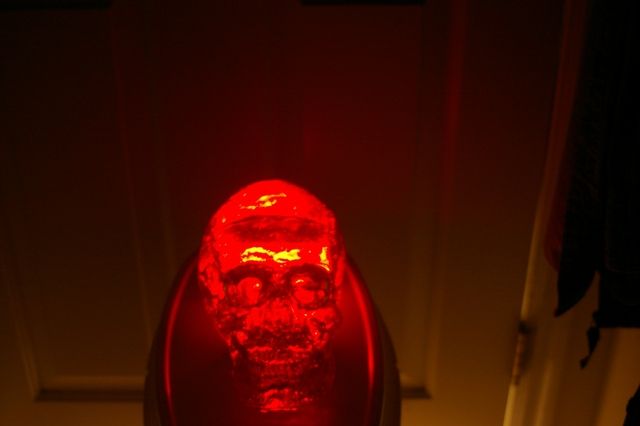
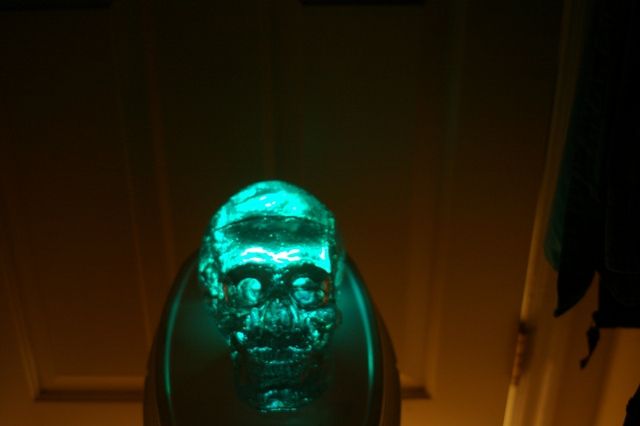
Edit: I see a lot of folk searching for the Island King torch and ending up here. So, I’ve got the picture of it’s comparison to a regular torch here for you.

Left: Island King torch after my aforementioned modifications to the wick.

Right: A regular tiki torch

Published
Categorized as Fire

The Crystal Skull

I’ve been getting some requests for better pics of the crystal skull, tripod enabled.

My pleasure.

Here we have it catching the light from the window.

From another angle.

From the back, you can see the tiny seem I still haven’t got around to trimming off.

Then, people have asked for some lighting tests on it. Well, here is a tiny battery operated color changing LED tea light. Let’s see how it pictures when I shut myself in the laundry room and stick the skull in front of that.

It reflects the red really well.

But I think I like the blueish color better.

Then, this orange/yellow is pretty cool too.

Of course, most likely I’ll be using firelight. And, it catches light from quite a distance. But, angle seems to be the important variable. Here from well away and below the skull.

Not an optimal angle, but still catching the light just fine.

Very shortly, I will be posting a ‘how to make your own crystal skull’. I’ll warn you up front, this is not the easiest, or cheapest of projects. And it carries some dangers along with it. Poisonous fumes, chemical burns, and more standard burns. So, common sense and proper plans and all that.

Fire!

Ah…finally. A proper FIRE.

Stopped by Target last night, for I had been informed their gas firebowl had been knocked down 50%. We get there, and after tracking down the actual way to purchase the dang thing, (Target, you really need a better means of purchasing the big stuff)we were informed that they had none left. But, we were welcome to take the floor model and get ANOTHER 20% off.

Uh. YEAH! So, we walked out of Target with this $250 firebowl for $100.

Filling up the propane tank, and it lights right up, Jen and I sat around it under the gazebo talking late into the evening as the storms rolled in overhead. Something that will more than likely become a normal occurance. This thing will be getting quite the workout over the summer. Cooking smores, hot dogs, just giving atmosphere, whatever.

But, come Halloween, I now have a means to make a proper fire to dance around. It looked great from the far end of the yard. And, it provided me a chance to look at my stuff in firelight, make sure it’s looking good for the big night.

The shrunken heads look SO darn good under firelight. It’s just plain down right creepy.

My mask…I’m not happy with right now. I tried to paint it this weekend. Wanted it to be monochrome, but was avoiding the white/grey/black of the last 2 years. And, a co-worker who always comically names my masks has deemed this one “Shrek”. Green seemed to be a good choice. The idea was to have black on the low lying areas and the raised portions gradually move to a green. Didn’t work well, the whole thing is just green right now. And, in the firelight looked like utter crap to me as I couldn’t make out any of the details.

Jen’s saying that’s mostly due to my trouble seeing shades of colors to begin with and it looks fine. I don’t know what to do. Looking into getting an airbrush. Hopefully to touch up and get the original idea of black around the low lying areas to come out. And, even when painted completely, we’re only roughly 1/2 done with the thing. Plenty of surprises left on this mask. I know I’ve been neglecting my picture duties…promise some will get snapped soon.

And, with the fire pit. May as well try the green fire…

A little spray bottle makes a nice green puff that lingers just a bit. Jen has pictures of that. We’ll have to get them up when I can.

Soaking paper, letting it dry, and tossing it on didn’t do much. Next, gotta try some wood chips. Some way or another, I’ll be getting something I can toss on to add a little theatrics with some green fire.

And, pretty sure the new neighbors have moved in…

Either they had company last night, or it’s some kind of group purchase of the place. Someone was out working the BBQ anyway. Didn’t recognize them, but it was dark. Hmmm…Proper way to greet them…A gift of skulls? Maybe I should start working on Fred?