We have arms.

Bob now has arms, complete with hinged elbows.

I was mentioning how the shoulders could have been easily hinged. And, the elbows prove it marvelously.

The secret? A couple clothes hangers, chopped up.

From bob

And, once again, relying on the tack of Power Grab to hold it in place while it dries.

From bob

We now need more paper clay. I got to tweak the recipe of that a tad, still. Started laying the ground work for the skull as well, but I’m not happy with it, so it will probably be removed.

From bob

So, skull, hands, some paint, and we’re ready to corpsify.

Yet more Power Grab

It’s rather strange, really.

Years ago, I needed to just add a little ridge to make that pelvis bone fit my head. Standing there in the hardware store staring at epoxy’s, glues, and caulk, Power Grab caught my eye, mostly because I had no caulking gun at the time, and it came in pressurized canisters…

Now, it’s become integral. From sculpting masks, to Paper Mache, we use the heck out of the stuff. To my knowledge, I’m about the only one out there really sculpting with the stuff, as well. Well, the blog does have unorthodox in the title…

Strong points of Power Grab being:

relatively high tack (though I’m not buying the commercial for a second)
Water cleanup
EASY manipulation
repositionable if you mess up
somewhat flexible when dry

Some weaknesses include:

It shrinks slightly when drying
can crack
Does not like freezing (while wet)
And it’s somewhat flexible when dry. (the higher the humidity, seems the more flexible it is. Have had some things tend to drift out of alignment if left for long periods in high humidity.)

We’ve learned, adapted, and come to love the stuff for both the strengths and weaknesses.

So, it should be no surprise that when it came to Bob’s forearms and hands, I’m relying on the old standby.

Cutting a quick and dirty template out of cardboard for the forearm, we arranged some pieces of wire hangers to make the fingers.

From bob

Of course, I needed “help”

From bob

Just squeeze out a little power grab into place, wet fingers, and smooth it out. Just getting a basic attachement at this point, we’ll mache the thing for the actual form later.

From bob

I did mention the water cleanup, right? It’s REAL simple to clean up while wet. Soooooo…I had ‘help’…

From bob

Rinse some hands, wash some table…

Anyhow, after about 2 hours under the cieling fan, they were dry enough to peel away from the plastic.

From bob

Currently, we’re out of Power Grab. Gotta run grab some more, then we’ll mache these suckers, make the hands, and attach the forearms. THEN we are ready to paint and corpse the torso, while starting on the legs.

Shoulders…

It has really been an interesting experience working on Bob…

One comes to appreciate just how complex the design of a skeleton actually is.

This evening, we attached the shoulders. An interesting bit of technical difficulty there.

The collar bone, shoulder blades, and humorous were all constructed of simple paper mache. But, to attach them, we have gone with full strength power grab. (remember, our paper mache recipe is based on power grab) I didn’t want the shoulders hinged for Bob, but that would have been a simple matter. We’ll get into that more when we do the forearms.

In case you were wondering, Bob here has, thus far, taken 1/2 a batch of the paper mache glue, and about a sunday paper’s worth of paper.

The high tack of the power grab enabling us to just slap the things in place with no reinfforcement. It will dry rock solid. And, the only thing we’ve done is prop the 2 humorous in place while it all dries.

From bob

Couple forearms, couple hands, and skulpting a skull, it might just turn out alright. Then we can corpsify it.

From bob

In some other news, for a planned project for next year, we found a little ‘table top fire bowl’ on sale at Wal-Mart.

It uses those 16oz propane bottles, and it’s all nice compact, and enclosed.

From Halloween buildup 09

I need another, possible 2 or 3. But, they are not exactly flying off the shelves at the sale price. And, only 1 local Wal Mart has started that sale price so far. I’m really not surprised. It’s not much of an actual firebowl…tiny little thing. So, we’re going to keep an eye on the stock levels, and watch the price points for now.

There once was a pinata…

Well, the pinata distraction is over.

The Power Grab Paper Mache worked well, it seems. No reinforcement tricks to the pinata (bamboo, duct tape, etc) needed. Only 7 layers thick at the end, much thinner than the previous 2 I made of traditional glue recipes. And yet, stronger, still.

I’ll have to get a few photos of it’s carcass up as well. But, I understand it survived 32 kids whacking it with a stick and a good drop when the rope it was hanging from broke before finally being put to death by an adult wielding a baseball bat.

Yeah, I think it will be strong enough to make a few halloween decorations that wont be the target of baseball bats, just fine.

A little swap meet find, here.

While slightly damaged, and obviously aged, the horns are tremendous. I’m debating just what to do with this thing, use it as is? Try to mold it? But, similar quality goat skulls go for $65 or more from Skulls Unlimited. And, the person selling it wanted $20. I got it for $10 after offering $5, and pointing out all the aforementioned damages and aging.

On one hand, it’s a bit strange just how much I’ve come to understand about skulls, able to identify a wide range, knowing this particular goat was suffering some pathology I cannot pronounce, let alone spell, but I know what I’m seeing. On the other, knowing your stuff makes it easier to barter with people.

Crystal Skull 2 is out of it’s mold, and 90% done. It’s hollow, and I had a mind to leave it so, but it’s not catching the light quite right due to that hollow center, so I’ll fill in the center soon and get pics of it up. Wonderful mold, that one. Really like the look in crystal.

So…plans for the weekend…(no work Friday, yay!)

Name the new kitten. (VLAD THE IMPALER!!!)

Jen was on board with it till people at work had no clue what or who Vlad the Impaler was. Come on, folks…DRACULA. HOW do you NOT know DRACULA!?

I actually put forward the name in jest. Along with Frankenstein and Jeckyl (since one of the 2 vets at the place we go is Dr Hyde…)

Getting Cozette to not kill the new kitten…Bumping some skull production and maybe a little Shrunken Head action as well.

On some site news.

I’ve added a link to the Rock Bottom Cemetery in the links section.

I don’t link to many places, but Blinky kicks ass! This is THE place to go to get the lindberg skull featured in the mold making, plaster skull, and crystal skull how-to’s. There is also a lot of other interesting stuff for sale there.

Speaking of the how-to’s, I’ve also added the howto for the Crystal Skull over there, and rearranged the sidebar a bit. It was time to get rid of that Indiana Jones widget, but I accidentally removed my countdown at the same time…gotta remember how I did that…

More experimentations…

There’s always some little test going on at the house.

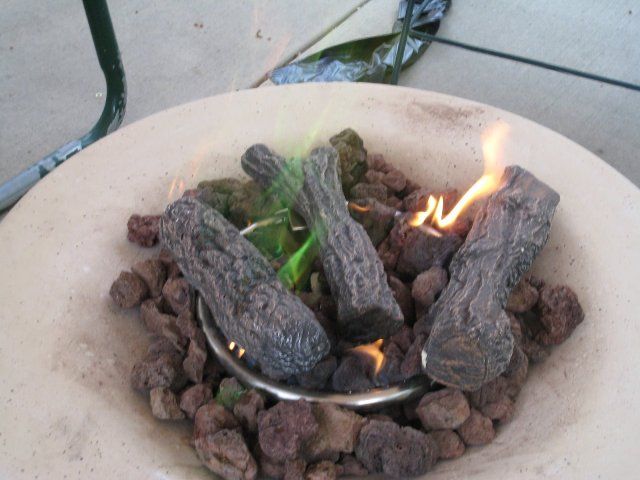
The green fire is coming along nicely.

I still need to figure some way of making it renewable. Soaking paper in the solution burned up too quick and was overpowered by the orange flames too quick. The next idea comes in the form of soaking wood chips.

Half-assed soaking of a lava rock gave a satisfying green burn for a surprising length. But, as it does not get consumed, it’s really not plausible to keep piling on more and more rocks…

The second experiment will likely begin this evening.

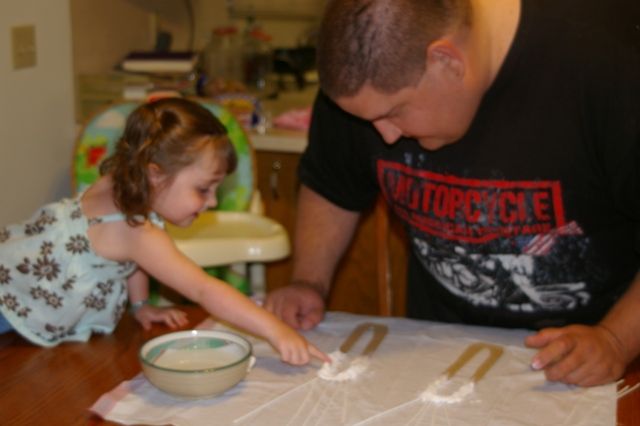
As spoken of previously, we’re looking for a means to make some nice suitable clothing for Fred. And, the first trial there was based on following the tutorial linked to over in the how-to section on the sidebar.

However, I’m a little wary of the fact that I don’t really have the pond water specified, and it may not rot quite as well.

Then, when looking up info on my grasses, I found this tutorial on clearing out grass for a flowerbed.

Sheet composting. Specifically the following section caught my attention.

“Sheet composting under a tarp works because the tarp traps both moisture and heat. Hot, dark moisture is one of the very best conditions for rotting.”

Hmmmm….that sounds aweful usefull…

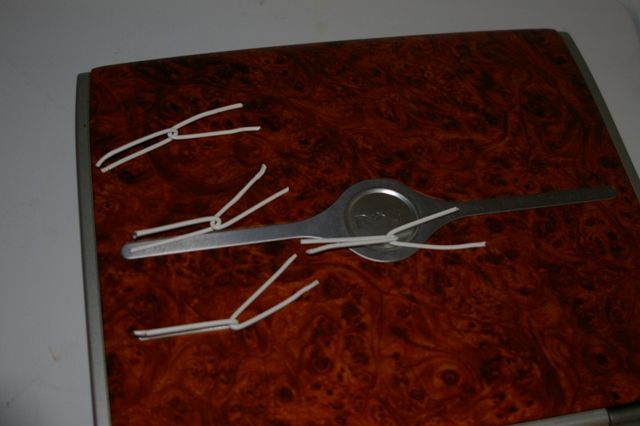
Since we’re clearing a section of the backyard for a patio anyway, I may as well run a couple tests. I’m going to grab some more clothes, and run a test on what I belive will be the best depth for this rotting of the clothes. But, I also have a bunch of pants of Alec’s that no longer fit and have holes in the knees. We’ll place them at varying depths for testing purposes.

So, come fall, I’ll have 2 sets of clothes for Fred, and a bunch of pants. I’m sure we’ll have a difinitive answer as to the best means of rotting clothes by then.

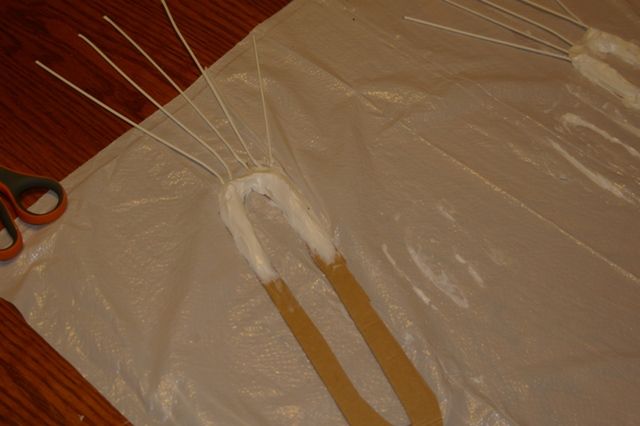
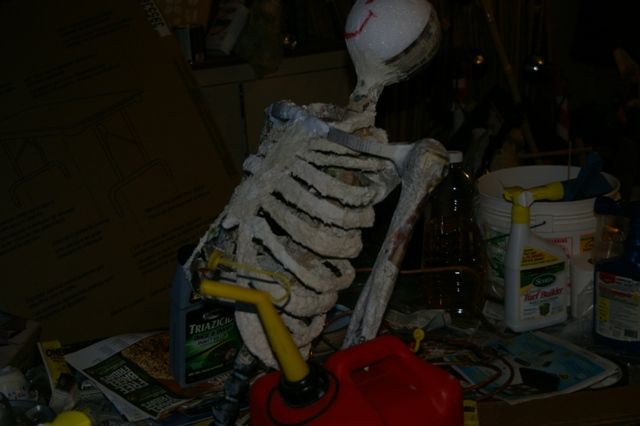
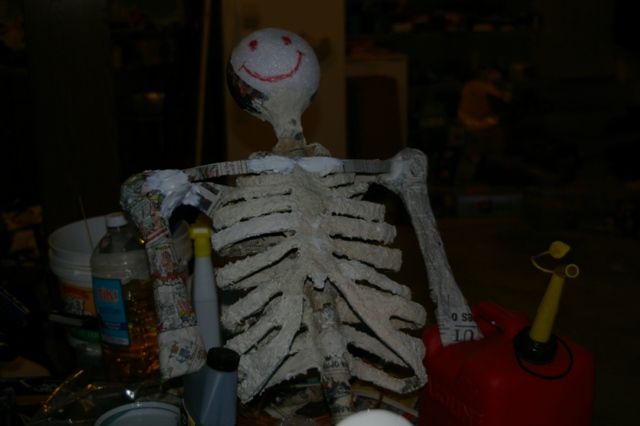
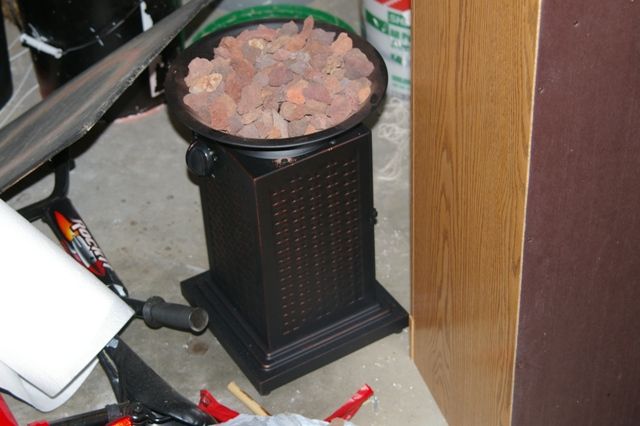
And just who is this Fred I keep mentioning?

He’s been hanging out in the garage for a while now. Needs lots of work still. If you get the joke with the name, good for you. If not, you’re not missing anything.

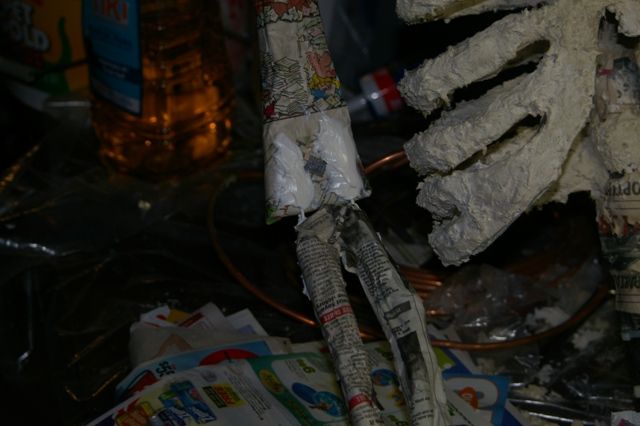
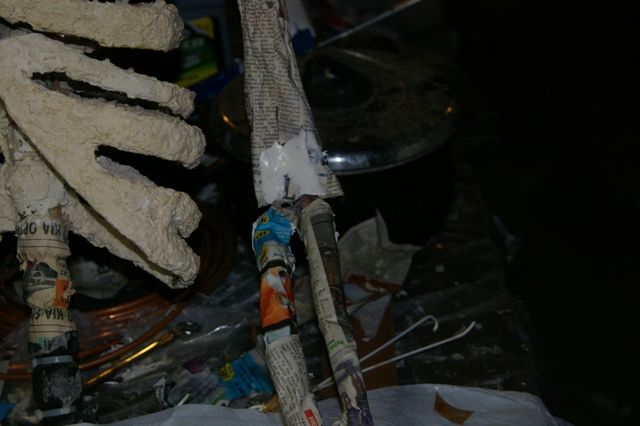
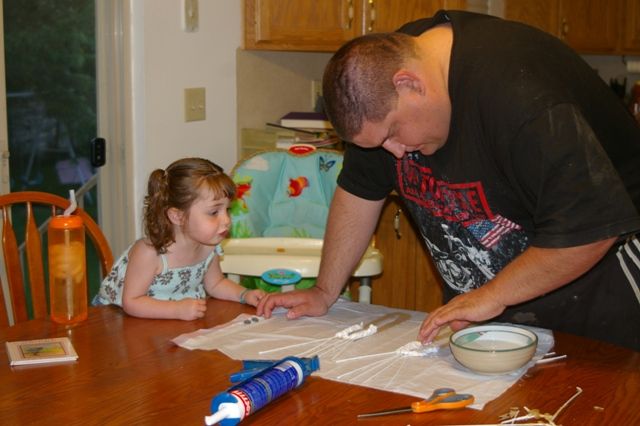
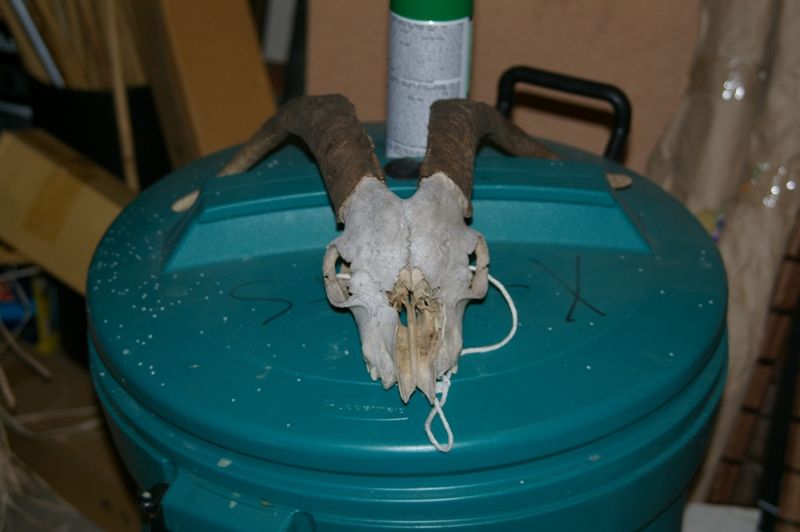
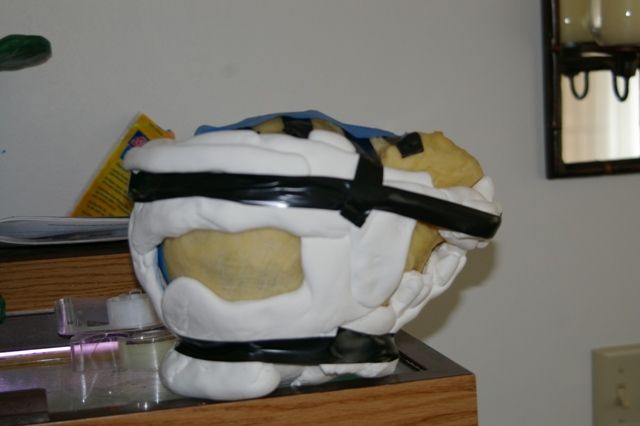
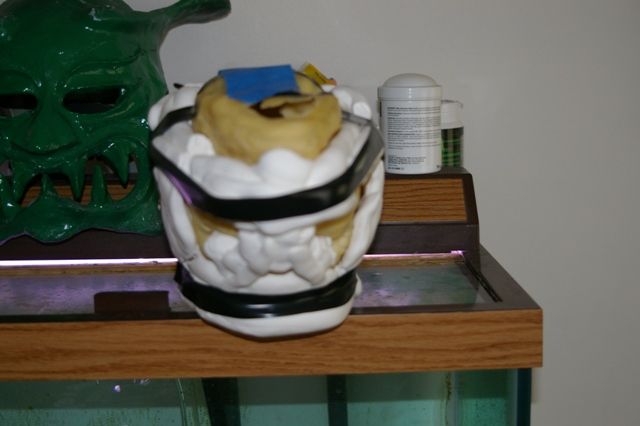
Then, we have the Crystal Skull experiment going on in the garage…

This is THE most insane mold I’ve ever tried. If it works, it’s likely to be the only full size one I make, just from cost of the acrylic resin. But, here’s the redneck mother mold in all it’s glory…

And finally…

I was in Michaels this last weekend, getting the aforementioned acrylic resin. I always check the Model Magic just in case it’s on super special price or something. And, there on the shelf next to it was this “new” tag, and a bucket of Crayola Air Dry Clay. The stuff was much cheaper than other airdry clays, so I picked up the small tub.

First test, I just rolled a coil and let it dry overnight. It was pretty solid in the morning, but not completely dry. Jen tossed it out, and I can’t blame her for thinking it was just trash.

The second test was using it to add in a bit on a new model for yet another mold I’m making. Adhered great, pleasure working with it, but thinner portions cracked. Fortunately, the model in question, cracks just will add to the end item.

Now, the stuff is superior to model magic in that it’s cheaper, dries stronger, and tools and works like a traditional clay. However, it is a touch heavier when dried, and more prone to cracks, and might shrink a tad more.

Meanwhile I look at my ole powergrab. Needs a base to apply onto, cannot sculpt from the ground up. Strong and flexible…

The wheels are turning…Clay + power grab kneeded together….hmmmm….results coming soon…