Stele work

It’s been slow going around these parts.

Plans for the year are needing to be changed, and some choices are going to need to be made, but it’s all for the best in the long run.

Our stele have been presenting me with quite the conundrum of late. Just how to do the sides.

Inspiration struck from the shipping dept at work, throwing out some…well, corrugated cardboard, but it’s flexible.

So, we made some templates out of this stuff, and have just finished a HUGE batch of mache to get the sides coated. From here, we’ll be able to curve another piece to fit over the fronts.

From 2010 Buildup

Had enough mache left over to finish up under the mouths on the stele as well. Hoping the hot weather scheduled for this week will help these dry swift, so they’ve been left out on the driveway, where we get the most sun. Oh, sure, the neighbors may wonder, but I think most of them are used to odd things at my place by now.

For those keeping track at home, these things have now gone through at least 4 different types of paper mache. From Celluclay to several home brews, this latest being paper pulp, wood glue, and joint compound. We’re getting closer to circling in on a favorite, but it’s not there yet, hence the no recipes of yet.

There once was a pinata…

Well, the pinata distraction is over.

The Power Grab Paper Mache worked well, it seems. No reinforcement tricks to the pinata (bamboo, duct tape, etc) needed. Only 7 layers thick at the end, much thinner than the previous 2 I made of traditional glue recipes. And yet, stronger, still.

I’ll have to get a few photos of it’s carcass up as well. But, I understand it survived 32 kids whacking it with a stick and a good drop when the rope it was hanging from broke before finally being put to death by an adult wielding a baseball bat.

Yeah, I think it will be strong enough to make a few halloween decorations that wont be the target of baseball bats, just fine.

A little swap meet find, here.

While slightly damaged, and obviously aged, the horns are tremendous. I’m debating just what to do with this thing, use it as is? Try to mold it? But, similar quality goat skulls go for $65 or more from Skulls Unlimited. And, the person selling it wanted $20. I got it for $10 after offering $5, and pointing out all the aforementioned damages and aging.

On one hand, it’s a bit strange just how much I’ve come to understand about skulls, able to identify a wide range, knowing this particular goat was suffering some pathology I cannot pronounce, let alone spell, but I know what I’m seeing. On the other, knowing your stuff makes it easier to barter with people.

Crystal Skull 2 is out of it’s mold, and 90% done. It’s hollow, and I had a mind to leave it so, but it’s not catching the light quite right due to that hollow center, so I’ll fill in the center soon and get pics of it up. Wonderful mold, that one. Really like the look in crystal.

So…plans for the weekend…(no work Friday, yay!)

Name the new kitten. (VLAD THE IMPALER!!!)

Jen was on board with it till people at work had no clue what or who Vlad the Impaler was. Come on, folks…DRACULA. HOW do you NOT know DRACULA!?

I actually put forward the name in jest. Along with Frankenstein and Jeckyl (since one of the 2 vets at the place we go is Dr Hyde…)

Getting Cozette to not kill the new kitten…Bumping some skull production and maybe a little Shrunken Head action as well.

On some site news.

I’ve added a link to the Rock Bottom Cemetery in the links section.

I don’t link to many places, but Blinky kicks ass! This is THE place to go to get the lindberg skull featured in the mold making, plaster skull, and crystal skull how-to’s. There is also a lot of other interesting stuff for sale there.

Speaking of the how-to’s, I’ve also added the howto for the Crystal Skull over there, and rearranged the sidebar a bit. It was time to get rid of that Indiana Jones widget, but I accidentally removed my countdown at the same time…gotta remember how I did that…

New revelations.

The redneck mother mold was a success.

We pulled the crystal skull out in all it’s gooey glory Teusday night. Damn rubber gloves busted but I managed to get the stuff off before we got any chemical burns. the skull is now drying in the garage. Still. The stuff we used is REALLY not meant to cast things this large, so it’s a slow process. Teusday it was down right gooey. Yesterday it was sticky. This morning, just a little tacky. We’re getting there.

Once it’s all dry we’ll get some pictures.

And, went to work on the pinata again last night, to be greated with yet another nugget of info about that paper mache glue I made…

In addition to fermenting, it freezes rather easily… as I had the second batch in the fridge to prevent it suffering the same fate as the former. Nothing else in the fridge is freezing.

On the plus side, it heated up just lovely. So…if I have leftover I may just purposely freeze it for a later date.

So, with the weekend approaching, our goals include finishing this pinata so I can get back to full time Halloween focus, finishing the mold of the little wooden skull, Getting some work on that next batch of shrunken heads, tending to my precious little Halloween grasses in the garden, and getting Kyle going on skull production.

I was also notified of some broken links off to the right. They are now fixed.

Of pinatas and skulls

Had a revelation with the paper mache glue…

Apparantly it can ferment. It didn’t mold, but it had something going on there…

Our dryer currently exhausts into the garage till we can get the duct going out back cleaned. I was keeping the pinata and glue in there, and with the dryer going all day, I cam home to notice it bubbling…that can’t be good…

I was presented with a most unique smell when I unwrapped it. Not BAD, really, just…odd. I decided to err on the safe side, and dumped the rest.

Made a new batch last night, and now the entire pinata is 7 layers thick, strong, durable. Time to add on the string, and finally, add on the spikes to make the ‘star’ pattern.

At least it’s something new…not another Darth Pinata:

And, in honor of the movie, and just to generally have some fun, I started a mold to make some full size Crystal Skulls. Figured I’ld give a few away, maybe keep one. It’ll be a more complicated mold than previous ones, so I’ll add it to the tutorial once it’s done as well.

Well, showtime starts in a few hours. I’ll be back with a review when I can. And yes, pics are coming this weekend.

Power Grab Paper Mache?

We’re taking a little semi-break from Halloween. Or rather, Jen had asked me to make ANOTHER pinata. This time for a church activity.

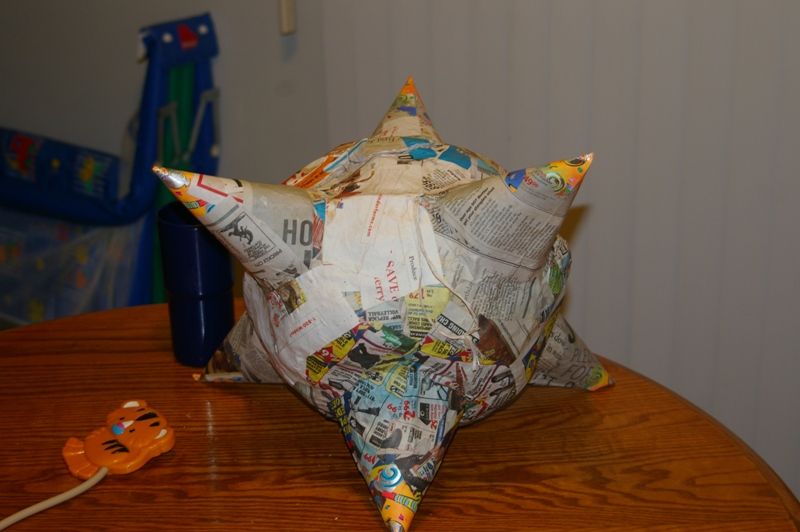
Now, my mind sees little wee ones whacking at a big ole devil shaped pinata with sticks shaped of crosses…however, I’m well aware most may not share my sense of humor on the subject. So, I settled on a traditional star pinata.

And, as long as I was making this, I may as well try out my new idea for Paper Mache.

First, there are a couple popular paper mache recipes:

Ye olde flour and water: Mix flour and water together to the consistancy you want. Easy, cheap, effective. Not that strong.

Ye olde cooked flour and water: Mix flour and MORE water, bring to boil and simmer down to consistancy you want. Same as above, but ensures no lumps.

Glue and water: Can’t get more easy. Slightly stronger than the flour/water, but does not flatten down as well, and prone to cracking.

Power Grab and water: Strong and flexible, does not stay suspended in the water well, needs constant agitation, does not flatten well.

So, I set out to combine the strength of Power Grab and the better properties of the flour pastes. And so, came up with…

The UnOrthOdOx Power Grab Paper Mache

Need: 1 tube all purpose Power Grab
2 cups Flour
Water
Salt
pot you don’t mind possibly ruining.

Measure 6 cups of water into the pot and bring it to a boil.
While it’s heating up, in another bowl measure 5 cups water, 2 cups flour, some salt to prevent mold, and 1 tube power grab. I used a whisk I bought at the local good will store.

Now, add the contents into the boiling water, stirring constantly till it reaches the desired consistancy. Think pancake batter. (About 3-5 min) Let cool before using.

*Optional* If the smell bothers you, add in some cinnamon to the mixture to mask it somewhat.

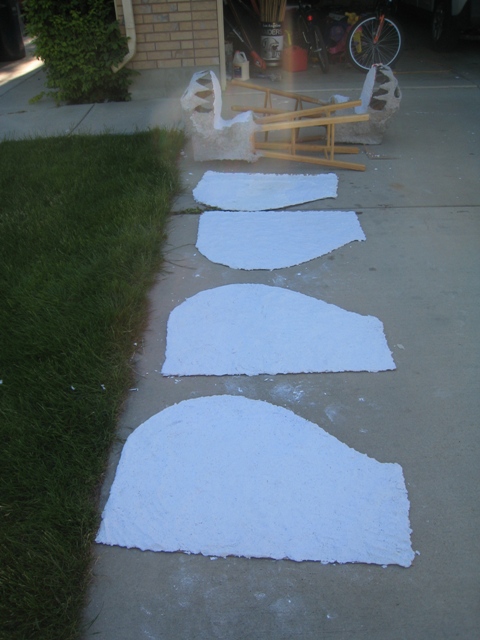
This stuff, has been a joy to work with so far.

With only 3 layers, it was strong enough to remove from the molds, and hold it’s shape while applying more layers. And, with only 3 layers, it could withstand me squeezing on it with flattened hands. But, it did tear in a spot when Jen put that pressure more on her fingertips. Not a problem for the pinata at this point, and valuable information for future halloween uses.

Once I get a fair few more layers on, I’ll be curious just how many kids will have to wail away at this thing before it breaks.

Now, as for the warning on the pot. I bought a junker pot just for these kinds of things. Boiling newspapers, making wierd experiments, etc. And, while it was in poor shape to begin with, we managed to take off more of it’s teflon while cleaning the glue off.